Algorithmic Face Swaps
Face swapping. That's a term that probably induces fear amongst the uninitiated plebs out there. I too was afraid once, terrified of what it can do (yes it's a joke, don't come at me with pitchforks).
Recently, I explored the interesting world of face swapping techniques. It's actually surprisingly intuitive, if you've ever played around in GIMP or, I don't know, Photoshop or whatever.
The basic recipe is of course that you first identify the area of the face for the image from where you want the face to be taken. Next, you identify the area where you want to place it, the target area. Then, in order to make the two facial areas match one-to-one, you need to perform a little transform magick so the source face contorts into the correct shape, corresponding with the target facial area. Finally, you want the colors to match and the seams to disappear, if any.
Technically, this could all be done by hand, so if you've the skill and some quick fingers, there's absolutely no need to perform it automatically. Unless doing so would be incredibly tedious, perhaps for video sequences or something. Now, performing face swaps in real-time is actually kind of expensive. I think I could achieve maybe 24 or so fps for a relatively small video on the CPU with hacks. With the GPU on the other hand, anything's possible, but who amongst us has a decent CUDA-capable GPU anyway? Not me, that's for sure (I used a Mac for this project). And besides, you wouldn't waste it on real-time face swaps. Rather, you'd play games with it or something.
Anyway, the point was, face swaps = usually expensive, and so you want to preprocess, in which case nothing matters anymore, you can spare a couple of minutes on the CPU if need be.
However, it's still fun to find the algorithm and see the results, which could even exceed what you can do by hand, depending on what kind of artist are you.
Automatic face swaps are composed of (1) finding the bounding boxes for faces, (2) finding facial features for performing the transform from source to target shape, (3) copy-pasting the transformed source to the target at the correct position, and (4) optional recoloring and smoothing. There's also the conceptually simpler route of approximating the entire pipeline with some neural network magicks. I'll demo my results with both the stepwise and the whole-thing approach.
First, the old-school stepwise, as I call it.
For the face-finding bounding boxes I used a CNN due to its superior accuracy, and for the facial features and transform I used a 68-feature extractor with the Delaunay warp algorithm (based on Delaunay triangulation, as it is known). Finally, I used a color transform and a tiny bit of Gaussian blur to hide the seams.
A CNN is of course one of those dreaded deep learning architectures. If you don't know what I'm talking about, I suppose you could call them function approximators. In this case, it's trained on faces: in go faces, out come some things that fully define a rectangle.
More exactly, the approach I've taken works roughly like this: first, there are a small set of predefined bounding boxes from which the CNN computes offsets. Second, we discard boxes that were too far off from the predefined ones. And finally, we merge all remaining boxes that we didn't disqualify into one box. This helps the CNN tremendously to find faces of all sizes using the same global method. The approach is detailed here.
Next, once we know where the face is, we need to find the key points — like the eyes, nose, mouth, and jawline. A facial landmark detector takes the bounding box as input and outputs a set of points (in this case, 68 of them) that mark these features. Again, convolutions and pooling layers extract the features and output direct coordinates (another CNN). These points are then used to figure out how to warp the source face onto the target face accurately.
There are actually a few ways to perform a warp like that. The simplest one being the affine transform (that is, using translation, rotation and uniform scaling to warp). Delaunay warps instead map the points to triangles first, and then use affine transforms for each triangle separately. This usually gives it a slight illusion of a 3D shape to the degree that it matches with the local feature geometry, thus preserving facial features with some added success. Make no mistake however, it's pretty far from a true 3D reconstruction.
The final step, as mentioned, is simply to paste the source onto the target, blend the colors so that the color profiles match, and remove any seams. In this case, I calculate the convex hull from those 68 feature points to tighten the bounds (the Delaunay triangulation itself is confined to the convex hull), and then I use the Lαβ color space in performing the recoloring.
By the way, using all 68 points might sometimes produce poor results and appear all distorted. In those cases it helps simply to skip a few points altogether, focusing mostly on those demarcating the eyes, the nose and the mouth areas. This is where the magick comes in: you have to experiment and see what looks good.
However, the Lαβ color space is rather a convenient choice because it separates (decorrelates) luminance from color information, as well as the color channels from each other. Note as well that Lαβ is not the same thing as Lab.
Color remapping is generally easy, and usually all about linear transformations. So is the case here, as well. I simply subtract the source mean, scale by the ratio of the standard deviations, and then add the target mean. It's all there behind that link. There's also a really cool book I found about colors that turned up in Google Scholar search results for some reason, by someone named Mark D. Fairchild. I'm not sure if it's supposed to be accessible from Scholar, but there it is. Still, I'm a big fan of physical books, so maybe I can find myself a copy somewhere? Better yet, wait for a new edition.
And the seams; nothing a little Gaussian blur won't fix.
Here's a couple of relatively good example results for this approach:
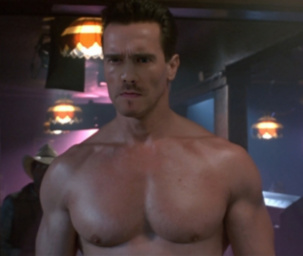
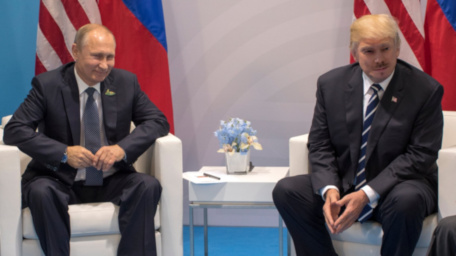
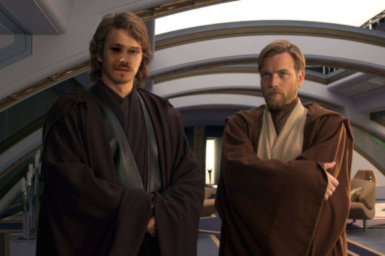
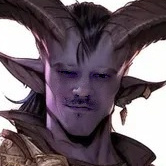
For the images, I've used random Google search results. I presume it's fine to use these without mentioning the original source for a simple non-commercial technical demo, in the name of fair use, especially since I've cropped and altered the originals. If not, my e-mail's in here somewhere.
Next, I suppose my exposition wouldn't be half-complete without mentioning those sweet end-to-end deep learning approaches. Those tend to get rather involved, and I'm not even all that sure the approach I took here is the state of the art, because the field keeps moving so quickly and new methods with all these funny names just keep coming.
Anyway, what I did was I first used RetinaFace to find the faces from both images. Next, I used ArcFace to find the features – well, I should say ArcFace doesn't exactly output features or points for us to use per se (depends on whether you think features preserve spatial or visual structure), rather it outputs an embedding vector that designates identity, i.e., it's just some bytes of information that encode the identity of the face. Finally, I used a U-Net-style GAN with ResNet blocks to blend the source identity on the target face. The way it works is that it encodes the features of the target face, injects the identity vector in from ArcFace, and then decodes the result into a new image, with the source face tacked on.
I believe this technique entire is called SimSwap, or at least that's where I got the inspiration for this. I've used pretty much the same or analogous technique here.
Here's some results with it:
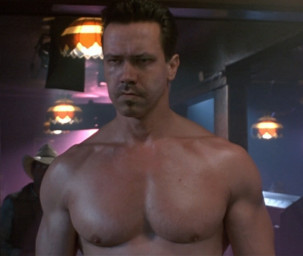
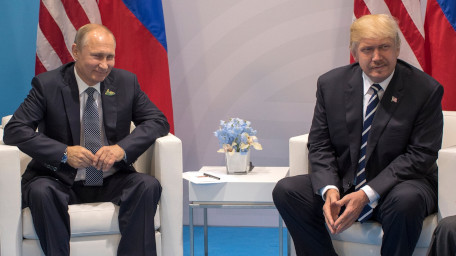
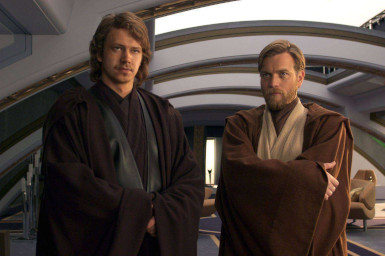

Personally, I'm kind of impressed, even though I've seen what's possible before. Still, I suppose it is noteworthy that the results between the crummy old-school approach and the SimSwap are simply different. Meaning, it depends on the desired effect which approach you want to take. Both can produce amusing results. I kind of suspect that for still images, some professional could maybe produce better results than any of these, as well. Not to mention you could train a network specifically for whichever face you wanted to swap, which I didn't do here.